This post contains promotional/affiliate links.
Thinking about cycling the Shikoku 88 Temple Pilgrimage, the henro? Most English guides are written for people walking it. This one is for cyclists. I rode the whole loop from Temple 1 to Temple 88 in one go, twice: about 1,300 km, roughly 100 km a day, staying in hotels and using a train for a few stretches. Below is what the route is actually like by bike, prefecture by prefecture.
- How far and how much climbing each of the four prefectures involves
- The climbs and descents that are hard on a bike, in the order you reach them
- Where a train, ferry or ropeway makes the day safer
- What I changed on the bike between my first and second ride

The Route at a Glance
The pilgrimage goes clockwise around Shikoku: Tokushima, then Kochi, Ehime and Kagawa. Riding the temples in that order is called junuchi. Doing all 88 in one trip is toshi-uchi. Splitting it into several trips, one prefecture at a time for example, is kugiri-uchi. Plenty of Japanese pilgrims do it that way.
These are the numbers from my own ride log. I split the sections where I crossed each prefecture line, so they are one temple off from the official prefecture groupings.
| Prefecture | Section (temples) | Distance | Total climbing |
|---|---|---|---|
| Tokushima | 1–23 | 225 km | 3,645 m |
| Kochi | 24–40 | 494 km | 9,122 m |
| Ehime | 41–64 | 424 km | 7,885 m |
| Kagawa | 65–88 | 179 km | 2,506 m |
| Total | 1–88 | 1,322 km | 23,158 m |
At about 100 km a day that came to just under two weeks. A few points that shape every day:
- The road is paved almost all the way. The exceptions are a few temple approach roads, covered below. You don't need a gravel bike.
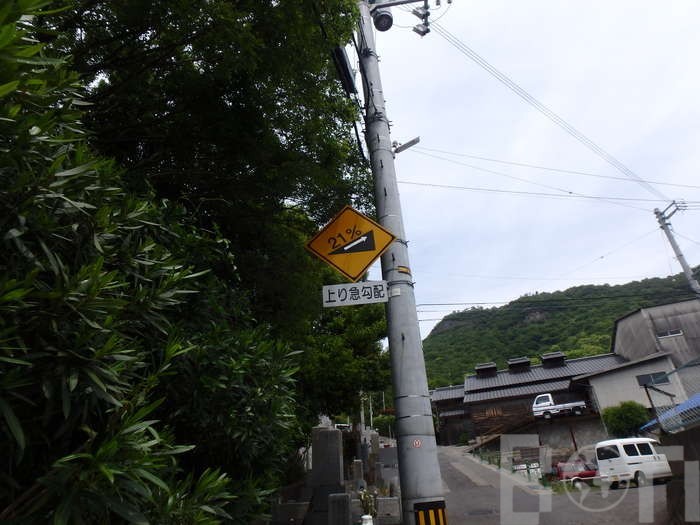
- The steepest gradient I saw signposted was 21%. Gentler slopes of 10% or more come up again and again on the way up to mountain temples.
- The hard parts are of two kinds: temples high on a mountain, and long coastal stretches with no shade and no towns.
- Some temples can't be reached by bike at all. At those you park and climb on foot, so plan your shoes around that.
Tokushima (Temples 1–23): A Gentle Start, Then the First Wall
Most of Tokushima is flat farmland between temples close to each other. It's a good place to find your rhythm. Temples 1 to 11 sit close together along the Yoshino River. I came in by overnight ferry from Tokyo and started riding from Tokushima Port.
Then comes Temple 12, Shosan-ji. For anyone doing the route in order, this is the first real wall. It's about 8 km at an average of around 7%, on a narrow road with a drop on one side and sections where two cars can't pass. Your legs aren't used to the route yet, so walking parts of it is no shame.
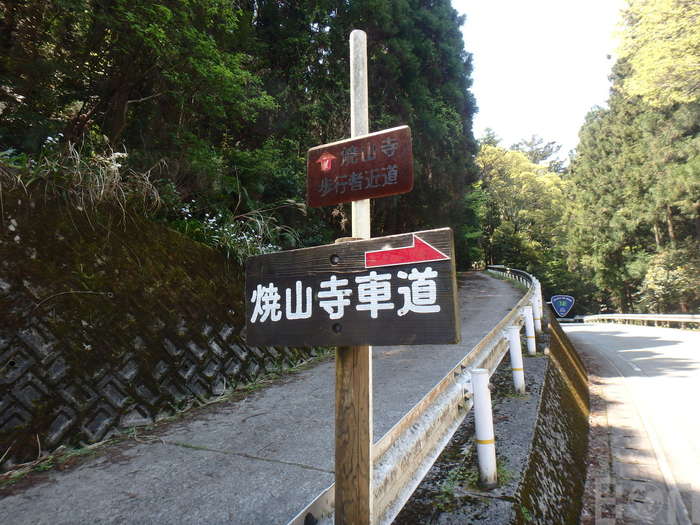
The south of Tokushima has two more difficult temples:
- Temple 20, Kakurin-ji: about 4 km at an average of 10%. The road surface was the roughest of the whole route. Ride gently for the sake of your tyres.
- Temple 21, Tairyu-ji: the most frightening descent of the trip. It's about 2 km dropping at an average of almost 20%, on a broken surface with fallen rocks. I went up by the Tairyu-ji Ropeway with my bike on board and rode the approach road down. If I did it again I would take the ropeway both ways.
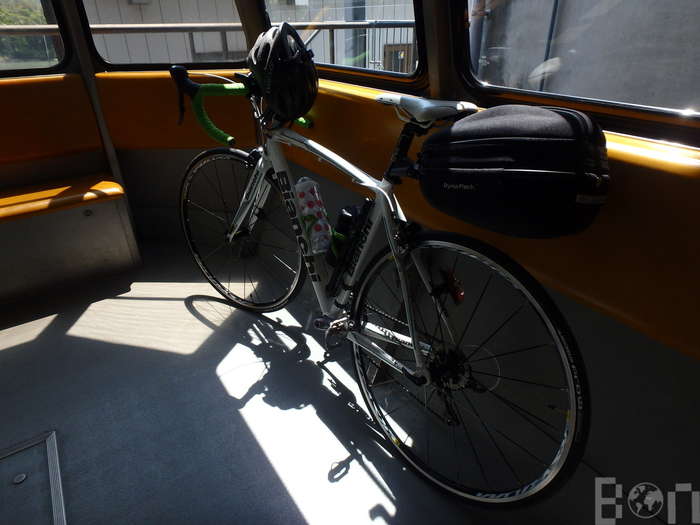
Whether bikes are allowed on a ropeway, and on what terms, is up to the operator. Check before you go rather than assuming it will be the same as when I rode. The Tairyu-ji Ropeway, the Unpenji Ropeway and the Yakuri Cable Car are all run by Shikoku Cable (Japanese site; for current fares, timetables and anything about bicycles, contact them directly).
Kochi (Temples 24–39): Long Distances and the Pacific Coast
Japanese pilgrims call Kochi the "dojo of ascetic training," and on a bike you understand why quickly. The temples are far apart. The prefecture has almost twice Tokushima's distance and climbing.
The first big day is the coast road from Temple 23 to Cape Muroto. That's about 90 km along the Pacific with very little in between, so carry water and food from the start. Three climbs come close together at and after the cape:
- Temple 24, Hotsumisaki-ji: about 1.6 km at around 10%, on a well-paved two-lane road. There's a temple lodging (shukubo) here. If you arrive in the late afternoon, stopping for the night is a sensible choice.
- Temple 26, Kongocho-ji: short, but save your legs. The next one is harder.
- Temple 27, Konomine-ji: the hardest climb in Kochi, about 4 km at around 10%. The old road is in poor condition. A newer road comes in from the Kochi city side. It's a longer way round but easier on the tyres.
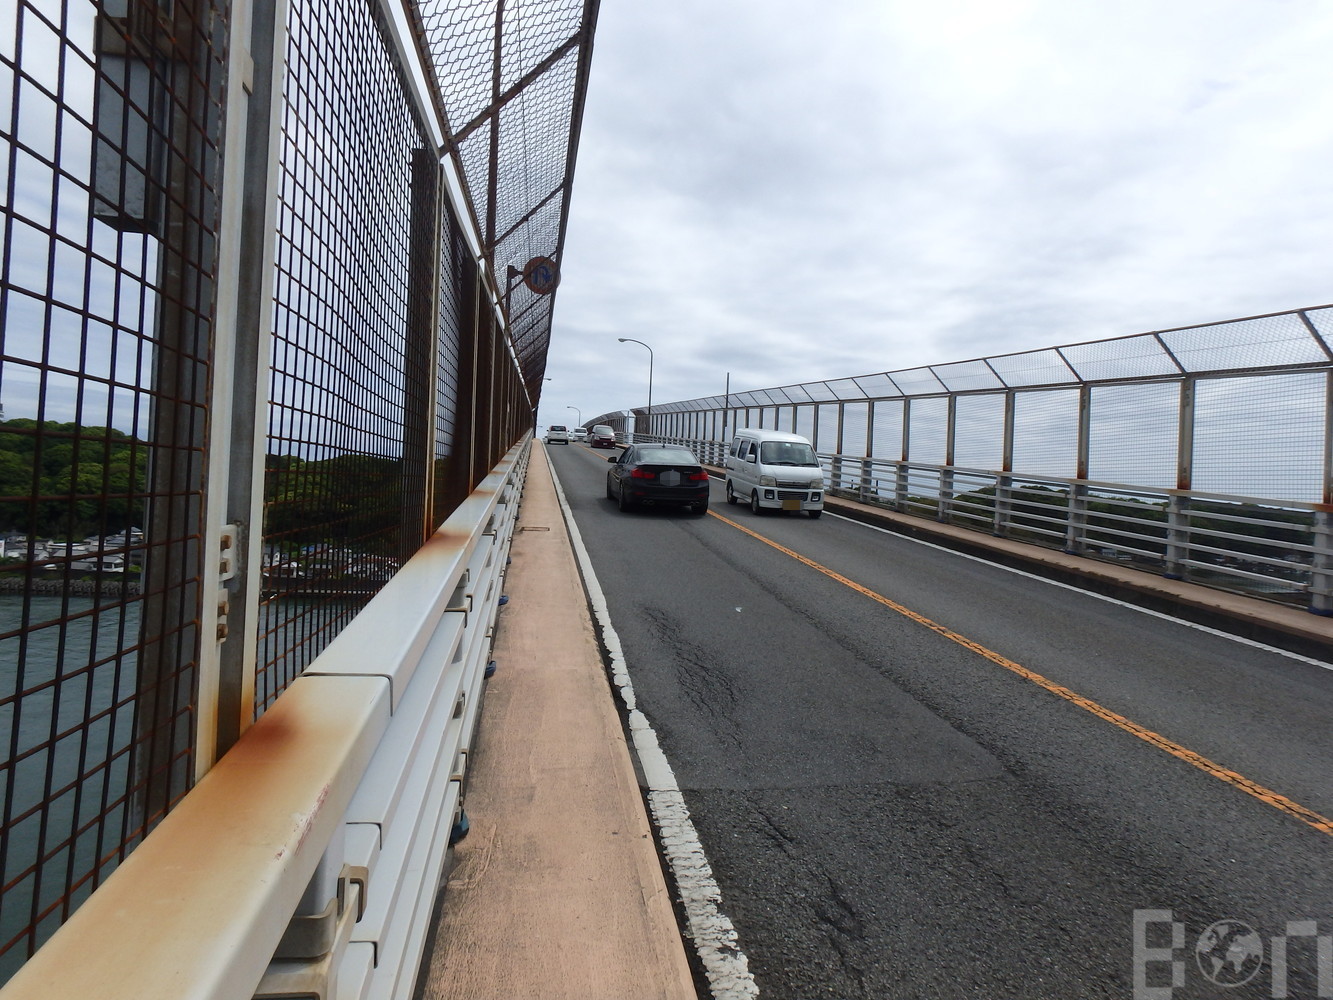
Around Kochi city, the climb to Temple 35, Kiyotaki-ji is short but steep and narrow, and the view from the top is worth it. The one place I'd single out is Urato Bay. On the way toward Katsurahama, the bridge across the bay has a very narrow sidewalk, heavy traffic, strong wind off the water and a steep climb. I rode it the first time without knowing and wouldn't do it again. A small prefectural ferry crosses the bay in a few minutes and carries pedestrians and bicycles. Check the current timetable on the Kochi Prefecture ferry page (Japanese) before you plan around it.
West of the city I put the bike in a bag and took the train from Kochi Station to Kubokawa. From there I rode along the Shimanto River to Nakamura. Temple 38, Kongofuku-ji sits at Cape Ashizuri, and reaching it means riding about 50 km around the cape. It's flat but long. There's a public footbath at the cape, a good place to rest before the second half.
Ehime (Temples 40–65): Tunnels, Mountain Temples and Cycle Trains
Ehime is the most cycling-friendly prefecture on the route. It also has two things to plan for: tunnels and mountain temples you have to climb on foot.
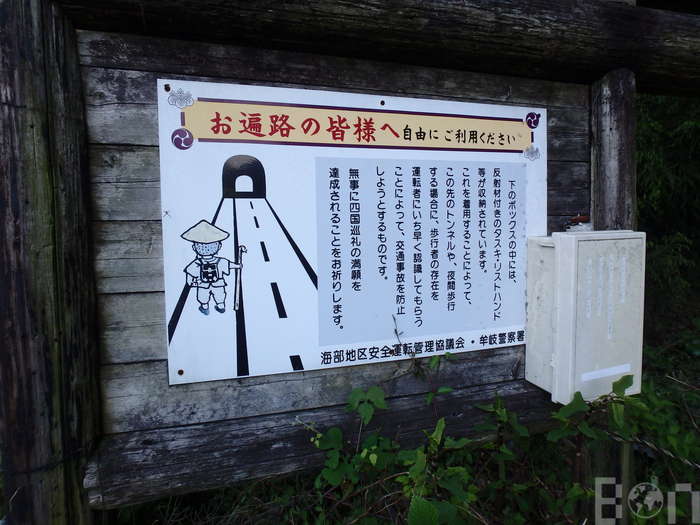
In the south, National Route 56 toward Uwajima runs through tunnel after tunnel. Many tunnels in Shikoku have no sidewalk. Some have one only on one side, so you have to cross the road to reach it. The longest on the route is the Matsuo Tunnel, about 1.7 km. It has a sidewalk, but it's dark and noisy and the traffic is fast. Some tunnels have a box at the entrance with reflective vests that pilgrims are free to use.
After Uwajima I took the train for part of the way to avoid more of the same road. Then the route climbs into the Kuma Plateau:
- Temple 45, Iwaya-ji: the pass before it isn't severe, but the approach to the temple is tiring.
- Temple 58, Senyu-ji: about 3.6 km that gets steeper toward the top. In rain, water runs down the road, and fog can make the descent nerve-racking. Walking up from the lower gate is the safer option.
- Temple 60, Yokomine-ji: the hardest temple on the route. You ride about 7.6 km at an average of around 9% to the trailhead at Yunami, then walk a mountain path of about 2 km each way.
- Temple 65, Sankaku-ji: about 5 km with small forks partway up that make it easy to take a wrong turn. The view over the Seto Inland Sea helps.
From Matsuyama to Imabari I used a cycle train, a service where you can bring your bike on board without bagging it. Services like this have come and gone over the years: they tend to run on specific lines, on weekends or as seasonal trials. Check JR Shikoku for what is running during your trip, and don’t build a plan around one.
Kagawa (Temples 66–88): Compact, With a Few Sharp Climbs
Kagawa has the shortest distance of the four prefectures. The temples are close together, so the riding days feel lighter. A few spots still deserve respect:
- Temple 66, Unpen-ji: the highest temple on the pilgrimage. After Tairyu-ji I didn't hesitate. I rode to the Unpenji Ropeway and went up with my bike.
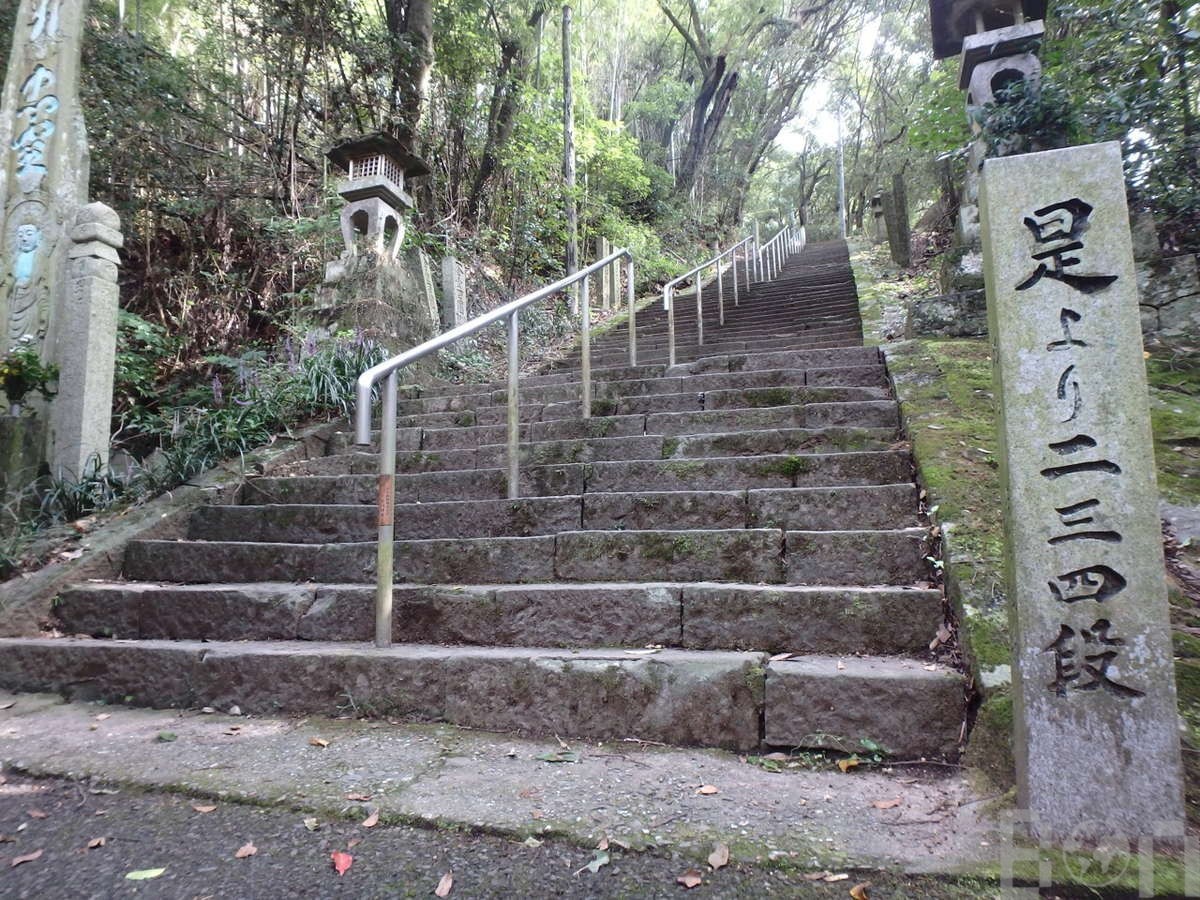
- Temple 71, Iyadani-ji: you can't ride to the top. It's a steep climb on foot of about 1 km. The stone steps are beautiful in fresh-green and autumn-leaf season.
- Temples 81–82, Shiromine-ji and Negoro-ji: a long climb over the Goshikidai hills. Neither part is steep, but you start climbing again straight after visiting Shiromine-ji.
- Temple 84, Yashima-ji: this is where I saw the 21% sign, followed by a steep approach road. It looks tidy, but it's one of the hardest approaches on the route.
- Temple 85, Yakuri-ji: you can walk up or take the Yakuri Cable Car.
- Temple 88, Okubo-ji: the last climb is long but not steep. It has truck traffic and blind curves, though. An old road branches off partway, and that's the quieter way to finish.
What I Changed After the First Ride
On my first ride I used an entry-level aluminium road bike of about 11 kg with an 11–25 cassette. I finished, but I kept thinking it would have been far easier with better information. For the second ride I changed the following:
- Lower gears. With 11–25, I had to put a foot down on anything steeper than about 15%. A 32-tooth largest sprocket took the fear out of the climbs. It also needed a compatible rear derailleur and chain, so ask a bike shop.
- Brakes. What scared me most on the first ride was a long descent in the rain. Some descents go on for kilometres, and a few are steeper than 20%. I upgraded the brakes and fitted better brake pads before the second ride.
- Lights. My first lights weren't bright enough for the tunnels. Second time I used front and rear lights bright enough to be seen in daylight. They ran on batteries, so a flat battery in the mountains wasn't a problem. Cars passed closer to me less often.
- Clincher tyres. Sports-bike shops are mostly in the cities, and the route is mostly rural. A small-town bike shop I stopped at stocked clincher tyres and tubes. Something more specialised might not be available. Fit new tyres before you go.
- Shoes and pedals. Many temples have long flights of steps, and some approaches are real mountain trails. MTB-style cycling shoes with recessed cleats work much better than road shoes. A cleat broke on me partway through, so I used pedals with a clip-in side and a flat side. That way a broken shoe doesn't leave you unable to ride.
- A lighter bike. For the second ride I used an aluminium road bike of about 8 kg. I chose aluminium over carbon partly because the bike would be bagged and carried on trains and ferries.
A wind jacket earns its place too. It's for the rain, and for long descents, where you cool down fast after a hot climb.
Practical Notes for International Riders
- Taking a bike on Japanese trains: on ordinary trains your bike has to be in a bike bag (rinko bag) with the wheels off. Practise packing and unpacking it at home. You'll do it on station platforms and ferry terminals.
- Cash: rural Shikoku is still more cash-based than the cities. Carry cash for temple stamp offices, small shops and family-run inns.
- Navigation: I built my route from a Japanese walking guidebook and followed it on a phone map. Walking pilgrims have marked paths. Cyclists usually stay on the roads, which don't always follow them. Keep a route that works offline in case you lose signal in the mountains.
- Bike shops and spares: outside the cities, assume you'll fix your own punctures. Carry tubes, a pump that mounts on the frame, and the tools to use them.
- Osettai: locals sometimes give pilgrims small gifts, such as a drink, fruit, or a walking staff left at the foot of a steep approach. It's customary to accept with thanks. It was the part of the trip I remember most.
Where to Stay
I stayed mostly in business hotels near stations. That made it easy to put the bike on a train if the weather or my legs gave out. Fees and prices change, so I won't quote them. The main costs to budget for are travel to and from Shikoku, a room for each night, food, temple stamp fees, and bike maintenance. In Tokushima I also tried a shukubo, temple lodging. Anraku-ji (Temple 6) has a hot spring bath, the only one among the temple lodgings I stayed at in Shikoku and on Mount Koya.
The larger cities make natural rest-day bases, each roughly at the transition into the next prefecture:
- Tokushima: the start, and the ferry and airport arrival point
- Kochi: the midpoint of the long Kochi section, with trains west toward Kubokawa
- Matsuyama: after the Kuma Plateau climbs, and a good place to rest with the Dogo Onsen hot spring
- Takamatsu: the last stretch, with easy access to Okubo-ji and onward travel
Hotels in Tokushima on Agoda »
Hotels in Matsuyama on Agoda »
Hotels in Takamatsu on Agoda »
Is Cycling the Henro Right for You?
Cycling suits you if you have about two weeks and want to do the whole loop in one trip. It also suits you if you're comfortable riding 100 km a day with some climbing. It isn't a quiet walk through the countryside. You'll share many stretches with traffic, and the mountain temples still make you walk. If you only have a few days, Tokushima's first temples or Kagawa's compact section make a good first trip. You can return later for the rest, the way many Japanese pilgrims do.
Deciding when to go? My guide to the best time to do the Shikoku pilgrimage, and what to wear covers each season. Once you reach the temples, my guide to temple etiquette on the Shikoku pilgrimage walks through what to do at each one.
I hope this helps you plan your own ride.